http://babbledabbledo.com/20-science-projects-for-preschoolers/
Adults can make these fun tube toys for kids to play with and demonstrate viscosity. Click here for the full project.
This project is very popular on the internet and I can see why. The combination of milk, dish soap, and food coloring makes for some color swirling magic! You can even dip paper in the milk to make a milk “print” to keep! See how we did it here.
40 more ideas for math and science project for kids: Fizz, Pop, Bang! Playful Science & Math eBook
3. WIZARD’S BREW
The basic recipe for this is originally from The Usborne Big Book of Science Things to Make and Do, a book I highly recommend you have in your library, there are many more fun ideas like this one! We added a rainbow twist to ours.
RAINBOW WIZARD’S BREW!
Ingredients:
- Baking Soda
- Liquid Watercolors or Food coloring
- Glitter
- Dishsoap
- Vinegar
- Glass jar
- Small plastic containers
- Tray
Instructions:
Fill the jar halfway with vinegar, then add a few drops of one color of liquid watercolor/food coloring and some glitter. Squeeze in some dish soap, stir, and place the jar on a tray. Now have your child add in a heaping teaspoon of baking soda, stir again, and watch the foaming begin! The soap makes it foam rather than fizz. To keep the reaction going continue adding baking soda and vinegar when the foam starts to slow. To make it change colors, add a tablespoon of vinegar mixed with one color of liquid watercolor/food coloring every so often. Make sure to dump the colored vinegar into the center of the brew.
Tip: Stir It! My kids discovered that the more they stirred the mixture the faster and crazier the reaction! Did you hear the screams of delight in the video?

This was one of our school year’s all time favorites for parents and kids alike. Check out this post for the full directions! It will take a few days for the glue to dry but then the box can be hung on the wall like a picture!
These can be made with any number of “adhesives” meaning any type of nut butter or in this case Crisco! See our full tutorial here.
6. MAGNETIC BOXES
Fill a clear plastic container with metal objects. We used nuts and bolts, pipe cleaners, bobby pins, brads, and paper clips. Hand your child a strong magnet and let them experiment with lifting the objects in the container without touching them. It’s magnetic magic!
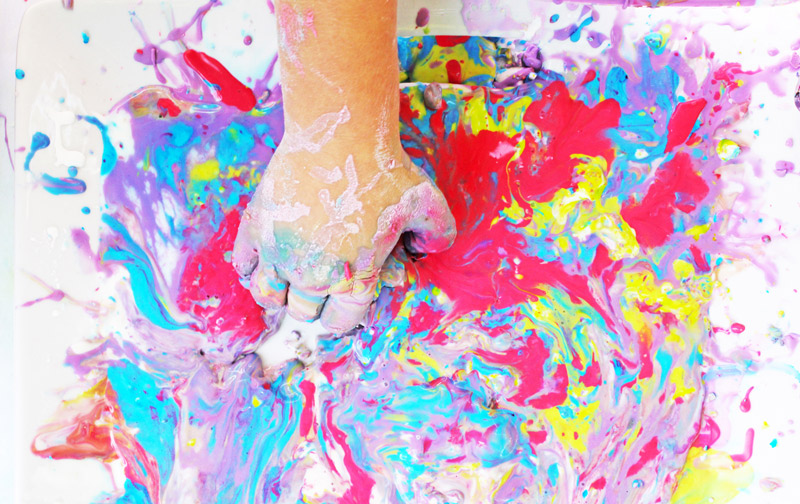
7. OOBLECK
AKA slime made with cornstarch and water. This is so much fun, even for the parents! It is very messy so please do it outside or in an easily cleanable place in your home. Add colors to the mix for swirling magic!
8. BUTTERFLY FEEDERS
My kids love butterflies!
Supplies:
- Small paper plate or plastic lid
- Yarn
- Over-ripe Fruit
- Orange juice
- Flowers
- Tape
Instructions:
Punch holes near the edges of a small paper plate or plastic lid. Tie yarn through the holes (have your child feed the yarn through the holes for a fine motor skills bonus), then gather and tie the yarn at the top as if this is a hanging plant. Have your child pick some flowers and tape them to the yarn. Add a piece of fresh fruit in the middle of the plate, pour a little juice on top, and hang in a place where you can see it. Admittedly it rained the day after we made these at school and our poor feeder was pretty thrashed, so I never saw a butterfly actually visit it. But most of the fun is in the making!
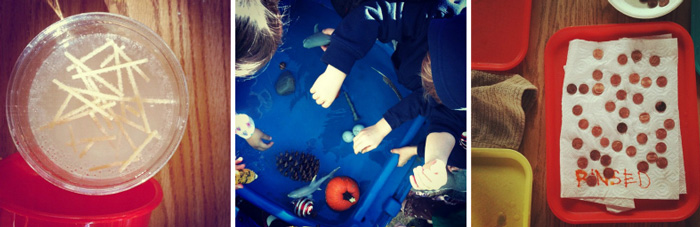
Super simple project you can do with a couple of items from your pantry. Mix water with baking soda in a clear glass or cup, and add a few small pieces of spaghetti to the mix. Then add vinegar. Bubbles will form on the spaghetti and make it “dance.” Additional instructions can be found here.
Another classic experiment. Fill a large bowl, kiddie pool, or water table with water. Collect a variety of objects that sink and float. Make sure to collect objects that are similar in size but vastly different in density, like a rock and a tennis ball. Ask your child to predict whether the object will sink or float and let them drop it in the water. Have your child classify them into two different stacks, the “Floaters” and the “Sinkers.” Sounds simple but trust me, it’s a hit with preschoolers!
11. SHINY PENNIES
This is a classic experiment and one that easily pleases preschoolers. Collect dirty tarnished pennies and have the kids soak them in a bowl of vinegar. Within a minute the pennies will be instantly “shined”. For an added bonus, rinse some of the pennies in water after the vinegar dip and then compare them to the vinegar only pennies; if you wait an hour the vinegar pennies will start to oxidize and turn green.
VARIATION: Experiment with other solutions to shine the pennies. You can try salsa (the acid in tomatoes also acts to clean the pennies), lemon juice, soap and water, and vinegar and see which one works the best.
See: 20 Quirky Cool Science Experiments for Kids

12. SEED STARTS Growing things is a very important lesson. I have done two variations on this project, one using cardboard egg cartons and the other using ziploc baggies. The ziplock bag yields the more interesting visual results and the egg carton version makes plants that are much easier to transfer to soil down the road.
- ZIPLOC VERSION: For the ziploc version buy a variety of seeds, beans and corn work well since they are large and easy to pick up. Give your child a folded wet paper towel and have them drop a small amount of seeds on it. Try to leave some space between the seeds if you actually want to plant them, otherwise the roots will tangle. Place the paper towel in a small ziploc bag and hang the bag in a sunny window or outside in a sunny spot. Within a few days the seeds will germinate and the roots will be visible.
- EGG CARTON VERSION: To do the egg carton version fill a cardboard egg carton with potting soil, wet the soil, and have you child place a seed or two in each egg compartment. Place the egg carton on a cookie sheet either indoors in a sunny spot or outside. If you place it outside it may get cold for the seeds at night depending on where you live so I placed some wax paper over the carton during the day to create a hothouse effect that encourages germination. Make sure you spray or lightly water the seeds on a daily basis as it is easy for them to dry out. When the plants have started to sprout you can break off the section of the egg carton and place it directly in the soil!
13. MARBLE RUN
Another favorite by all! Don’t throw away your paper towel and toilet paper rolls. Cut them in half and let your child decorate them with markers or stickers. Then tape them to a large piece of cardboard or a wall or foam core using painter’s tape. Have your child determine where each track piece should go. Let them drop a marble down the run so they can see why certain spots/angles work better than others. The painter’s tape allows for easy adjustment. We used duct tape once the entire run was complete to secure the run in a more permanent fashion.
14. COLOR MIXING
There are so many variations of color mixing projects and kids seem to love every one. Here are three ideas to try:
- Magic Colors! Pour water into three large bowls, then add blue, red, and yellow food coloring to one bowl each. Have an additional color mixing bowl available for your childand a dumping bowl. Give your child two plastic cups and let them experiment with taking a cupful of water from two of the primary colors and pouring them in the mixing bowl. Because the new color appears almost instantly it seems like a magic trick! Dump the third color in the dumping bowl and repeat the experiment. Using light colored or glass bowls makes the new colors more visible.
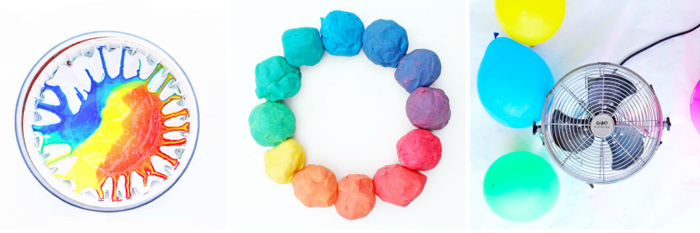
- Rainbow Spin Mixing Using an old salad spinner you can mix colors by spinning paint!Click here for the full project.
- Color Wheel Playdough Use red, yellow, and blue play dough to mix different shades of colors. Click here for the full project.
This is a fun interactive project that illustrates the idea of a vortex. And let’s be honest, what preschooler can resist balloons that hover mid air? Project and video available here.
16. WORM INVESTIGATION
It’s no secret; I love worm bins. They are fun for kids and make rich compost. We took some worms out of the worm bin at school one day, placed them in a pile of dirt in plastic tubs, and gave the kids magnifying glasses and tongue depressors to help them observe the worms (use the depressors to gently lift the worms out of the soil- fingers work too!). Then at snack we saved all our green waste and “fed” it to the worms back at the bin. If you don’t have a worm bin you can collect some earthworms and do a similar investigation. I find wetting the soil in a nice shady area in your yard usually bring a few worms to the surface.

17. LAYERED LIQUIDS
What can I say, kids love mixing liquids togther! You can do this project with common pantry ingredients, messy but worth it! Instructions here.
18. SMELLY GAME
This will be either a hit or a miss in your house depending on if your child can stomach a variety of smells. Yes, there are some stinkers but also some sweet ones. It’s fun to think of things to put in the jars. An alternative is to use yogurt cups covered with a lightweight cloth or with holes poked in the lid. Then you can use actual objects in the containers instead of smells in a liquid form. Printable template and instructions here.
19. DIY CHIA PET
Fuzzy is still sitting on my kitchen counter! This activity requires parent involvement, it’s a little tricky for preschoolers, but they will love watching their “pet” grow. Details for making your pet are here.
Kids love scavenger hunts. Period. If you take the time to set up one related to a specific idea it can be a learning exercise. Since preschoolers for the most part can’t read, I create visual lists with images pulled off the web. For a recycling themed scavenger hunt I divided up items into three categories: compostables, recyclables, and trash. Then I hid these items around the school and gave each child one of the lists attached here: Recycling Scavenger Hunt Sheets. They had a blast finding the items. I re-hid them quite often so they could repeat the hunt.
This comment has been removed by the author.
ReplyDeletethis site awesome for kids.i lay something bare science project for kids these site.
ReplyDeletescience project for kids.
it's superb educational site for kids.i think everyone learn about science project for kids here.
ReplyDeletescience project for kids.